Migrating Permissions from V3
Requires. The Permission Groups permission with Modify, plus access to the Users and Office Locations admin screens.
The new SecurityTrax uses a permission model that is fundamentally different from the one you used in V3. Your permissions did not carry over automatically — you have to set them up once. This page walks you through exactly what changed and what to do.
Note. This is a one-time transition guide. Once your company is fully set up in the new SecurityTrax, you can ignore it.
Is this page for you?
This page is only for administrators whose company is moving from V3 — the previous version of SecurityTrax.
You were on V3 if your login screen looked like this:
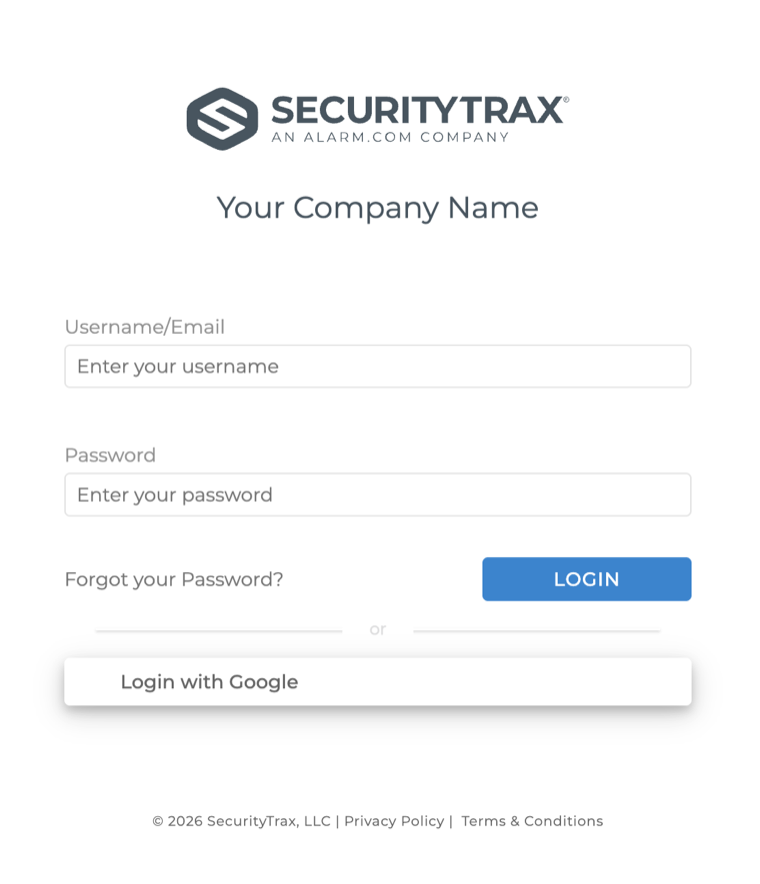
If your login screen does not look like the image above, you are already on the new SecurityTrax and can skip this page.
What changed — the big picture
In V3, permissions were simple but rigid. In the new SecurityTrax they are more flexible, and that flexibility is exactly what you have to configure.
Three things are different, and they build on each other:
| V3 (before) | New SecurityTrax (now) | |
|---|---|---|
| How many groups a user is in | Exactly one group per user. | One or more groups per user. |
| Where a permission applies | Company-wide. A grant applied everywhere. | Per location. A group only grants access at the locations you assign it. |
| How a user gets access | Put the user in a group → done. | Give the group its permissions and assign the group to the user at specific locations. |
The single biggest shift: *a permission is no longer just "what," it is "what and where." A user can be a Manager in Denver and a Technician in Boulder — different groups, different locations, same person. V3 could never express that; the new model does it naturally.
The three pieces of the new model
Think of the new model as three moving parts that snap together:
- Permission groups — a named bundle of access, like Billing Clerk or Install Tech. A group says what a user can do (View, Create, Modify, Delete each feature). This is the closest thing to your old V3 groups.
- Locations — your branches or offices. Every group is available at every location; you choose which locations to actually use it at.
- Users — each user is assigned one or more groups, at one or more locations. This is the step V3 never had, and the one most likely to be missed.
Access only exists where all three meet: this user, holding this group, at this location.
The good news, and the work that remains
Your group names came across. The groups you built in V3 still exist by name in the new SecurityTrax, so you don't have to reinvent your roles from scratch.
But two jobs are not done for you:
- A. Each group needs its new-SecurityTrax permissions set. The old V3 grants don't map one-to-one, so every group starts with its permissions unconfigured. You choose the View / Create / Modify / Delete checkboxes for each group.
- B. Each user needs their groups assigned at the right locations. In V3 a user was simply "in a group." In the new model you must say which locations each group applies to for each user. Until you do, the user has no access — even if they're clearly meant to be in a group.
The rest of this page is how to do A and B.
The one exception: the SecurityTrax All-Access group
The SecurityTrax All-Access group is the exception to all of the above. It carried over fully configured, and every user who was in it is already assigned to it at all of your current locations. Those users can already do everything, everywhere — you don't need to set anything up for them.
That default only covers the locations you have today. If you add a new location later, your All-Access users are not automatically granted access at that new location — no user is. To give them the same all-access reach at a new location, open each user's Permission Groups & Roles tab and assign the SecurityTrax All-Access group there, exactly as in Step 3.
Step 1 — Review your groups
- Go to Administration → Permission Groups & Roles (or open
https://portal.securitytrax.com/{your-company}/admin/permissionsdirectly). - The Group Permissions table lists every group your company has, with a Members count and a Description.
- Confirm your V3 groups are here. If you want a group that doesn't exist yet, click Add Group, or Create from Template for a ready-made starting point for a common role (Sales Rep, Technician, Office / Admin, Inventory Manager).
Tip. Starting a group from Create from Template pre-checks a sensible set of permissions for that role, so you review and adjust instead of building from an empty grid. Nothing saves until you press Save.
Step 2 — Set each group's permissions
This is job A — telling each group what it can do in the new SecurityTrax.
-
From the Group Permissions table, click a group's name to open the Group Permissions editor.
-
You'll see a grid: each row is a feature (Customer, Invoice, Equipment, and so on), grouped into category sections (Administration, Customers, Leads, Reports, and more).
-
For each feature, check the access this group should have:
Column Grants the ability to View See the feature and its records. Create Add new records. Modify Edit existing records. Delete Remove records. Yes For features that are a simple on/off (no create/modify/delete), a single checkbox instead of the four above. -
Use the section-level Select All Permissions / Clear All buttons, or the Toggle All in Row double-check icon next to a row, to move faster.
-
Click Save (returns you to the index) or Save & Stay (keeps you in the editor for more edits).
Repeat for every group you use.
Warning. Reports are special: a user with a Reports permission can see data across your whole company, ignoring the per-location limits that restrict everything else. When you open the Reports section the editor warns you about this. Only grant Reports access to groups you trust with company-wide visibility.
Tips for recreating a group's V3 permissions
V3 and the new SecurityTrax describe permissions differently, so the two models don't line up one-to-one — and because they don't, there's no automatic import for your regular groups. Copying the old settings across verbatim would produce the wrong access, so instead you recreate each group's permissions by hand. It's a one-time task, and these tips make it quick:
- Work with both systems open side by side. Sign in to V3 in one browser tab and the new SecurityTrax in another (or two windows). Put the V3 group's permissions on one screen and the new Group Permissions editor on the other, and translate one group at a time.
- Read V3, check the new. In V3, look at which actions the group was granted for each item — View, Create, Modify, Delete. In the new editor, find the matching feature and check the same boxes. The four action names are the same in both systems, so most rows are a direct like-for-like.
- Start from a template when one fits. For a common role (Sales Rep, Technician, Office / Admin, Inventory Manager), use Create from Template first, then compare it against the V3 group and adjust only the boxes that differ — faster than starting from an empty grid.
- Build the closest group first, then duplicate. If several V3 groups are variations on a theme, set up the closest one, then use Duplicate Group in the editor and tweak the copy instead of rebuilding from scratch.
- Expect a few names to differ. Some items are grouped or labeled a little differently in the new SecurityTrax. If you can't find an exact match, look in the same category — Customers, Leads, Reports, Administration — for the equivalent feature. The Permission Reference explains what each one controls.
- Reproduce what the role should do, not every old checkbox. A migration is a good moment to drop access a role never actually needed. Aim for the right result, not a perfect mirror of the past.
- Verify each group when you're done. Use the Permission Analyzer (Step 4) to confirm a real user in that group ends up with the access you intended.
Step 3 — Assign groups to users, at locations
This is job B, and it's the part that has no V3 equivalent — so it's the step people forget.
- Go to Administration → Users and open the user you want to set up.
- Click the Permission Groups & Roles tab.
- You'll see every location listed. Expand a location to see the groups available there.
- For each location the user works at, check the group(s) they should have there. Checking a group at a location automatically includes that location for the user.
- Click Save.
The same user can get different groups at different locations — check Install Tech under Denver and Service Tech under Boulder if that's the reality. That's the whole point of the new model.
Shortcuts on this screen
Setting every user up by hand is a lot of clicking. These help:
| Control | What it does |
|---|---|
| Copy from User | Copies another user's entire location-and-group setup onto this user. Great for onboarding someone identical to an existing teammate. |
| Copy to All Locations from Location | Takes the groups you picked at one location and applies the same set to every location the user has. |
| Select All | Checks the assignable groups across all locations. |
| Preview | Shows what the resulting access will be before you save. |
| Remove All Permissions | Clears every location and group for this user. Use with care — it cannot be undone. |
Assigning many users at one location at once
If you'd rather work location-by-location than user-by-user:
- Go to Administration → Office Locations and open a location's Edit screen.
- Click Permission Assigner.
- Pick one or more groups and one or more users, and assign those groups to those users at this location in a single step.
There's also a Permission Clone option on the same screen that copies an entire location's group assignments from another location — useful when you open a new branch that should mirror an existing one.
Step 4 — Verify with the Permission Analyzer
Before you call the migration done, spot-check it.
- On the Permission Groups & Roles page, click Permission Analyzer.
- Use Individual User Lookup to confirm a user has the access you expect, and where it comes from (which locations and groups grant it).
- Use Permission Search to answer questions like "who can modify customers in Denver?" — handy for catching users you forgot to set up.
If a user seems to be missing access, the usual cause is a missed Step 3: the group's permissions are set, but the group was never assigned to that user at that location.
Quick reference — V3 habits that no longer apply
- "Just put them in the group." No longer enough on its own — you must also pick the locations where that group applies (Step 3).
- "One group per person." A user can now hold several groups, and different groups at different locations. Assign the mix that matches their real job.
- "Permissions are company-wide." Only Reports behave that way now. Everything else is limited to the locations where the user holds a granting group.
- "Editing one person's permissions." Prefer moving people between groups over hand-tuning individuals. When a role changes, change the group assignment, not a pile of individual checkboxes.
Related
- Permission Groups & Roles — full reference for the permissions area, the group editor, and the Permission Analyzer.
- Users — where you create users and open the Permission Groups & Roles tab.
- Office Locations — manage the locations your group assignments are scoped to.
- Permission Reference Overview — what every individual permission controls.